Love all the original bits of my Westy. She’s so pretty and so, so practical. But, I gotta gripe about the refrigerator. You can’t beat the practical nature of the original, vintage fridge. Off the grid on the propane that sucker will run for days, for weeks. But, here in Northern California (and much of North America) where temperatures in July and August are over 100-degrees, it just doesn’t do the trick. It will cool down about 40-degrees below the outside temps, but unless it’s 80-degrees or less, food isn’t kept cool enough to avoid spoiling. This means on most of our trips we use the fridge for storage and pack our cold-foods in an ice-chest, which then takes up space. And, space in the vanagon is a premium.
Since this is just how things are, a lot of people opt for the refrigerator elimination kit that you can buy at GoWesty. I mean it’s a cool alternative because it buys you some space in the cabinetry. But you still have a loss when it comes to packing around an ice chest. Some others opt for a portable refrigerator, which is basically like an ice-chest, so even if you gain space in the cabinets, you lose floor space. GoWesty makes some good arguments for why portable fridges are a good alternative to a horizontal replacement. But, Joe and I agreed we like that the vintage fridge is built-in and out-of-the way. And, we didn’t feel like we needed the extra cabinet space–after all–we’d rather go more minimal than have more space for crap we can live without.
So we opted for a modern replacement.
After some research into options, we found several people installing the T49 Truck Fridge. Van Cafe sells this refrigerator along with a trim kit. I found after taxes and shipping costs, it was most cost effective to buy it directly from the manufacturer. All told around $700. And, after watching a few install videos and reading other blogs we opted to make our own trim kit. I recently came upon this blog where the subject opted for a bigger version of the truck fridge, the T65. He does a good job in his three-part blog detailing the work he did to customize the cabinetry to work with the larger fridge. We didn’t feel confident ripping out big pieces of the cabinets and messing with the structure; plus projects like that seem to never get finished at my house, so we went with the T49 which just slips into the old refrigerator space with pretty minimal modification. I definitely surveyed the Samba Forum and any other blogs or videos I could find to get me started.
First step in this transition is removing the old refrigerator. Go Westy has a great video detailing how to remove the vintage fridge. And our fridge came out basically as easy as it the video explains. No surprises.
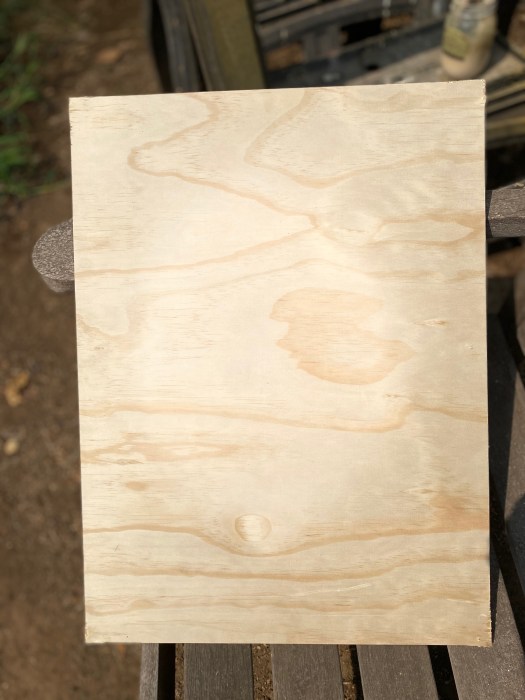
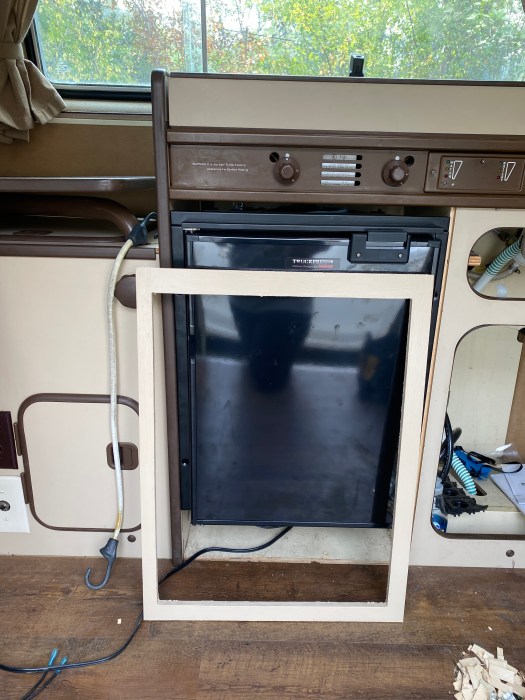
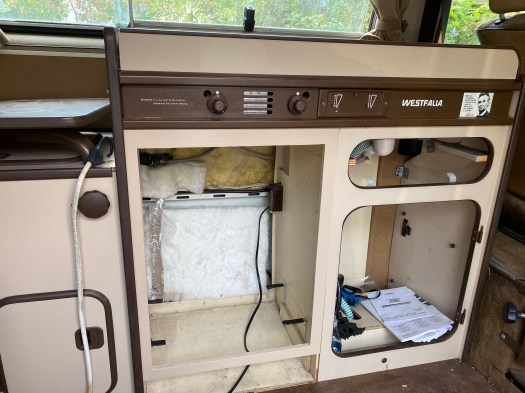
From here, we had to create a trim to go around the new T49. The old refrigerator was screwed into the cabinets on each side providing stability. The trim was built into the cabinet offering additional stability. Though bigger in cubic feet, the T49 is a bit narrower than the original it also has a front trim that must screw into a faceplate. Some of the blogs I came across suggested modifying the original trim for the new fridge. This makes it match and gives it a more built in feel. Since the original trim is part of the vintage fridge–which we hope someone will repurpose–we decided to make our own. We bought a 4 ft piece of plywood and used the original trim-piece to size the new faceplate. Then, we measured the opening (which are basically the dimensions of the back of the new fridge and cut an opening. There is a little cut out on the edge, which you could do easily with a router. Since we didn’t have one, Joe just used a chisel to notch it out.
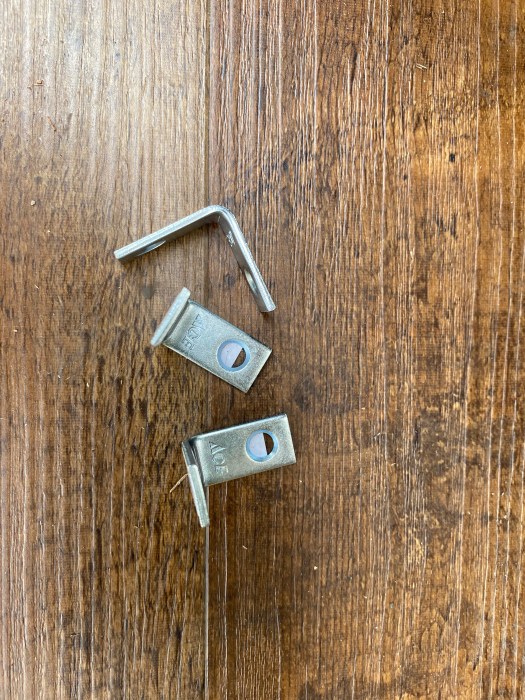
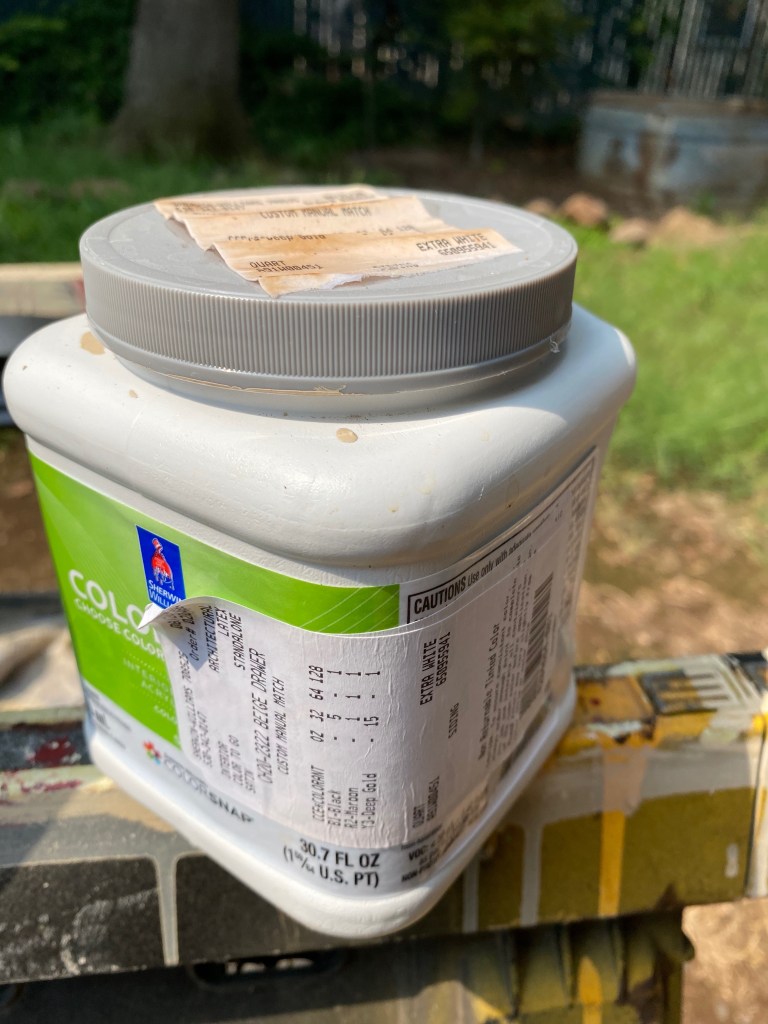
We wanted the new plywood faceplate to match the original cabinetry even though very little of it will show because I am like that. One way to do this is to buy the laminate from GoWesty. Instead, I took the original fridge door to my local Sherwin Williams paint store and they matched paint to the laminate. It cost me about $6 for a tester quart of matching satin paint. After a couple of coats, I covered it with two coats of Deft clear-coat. Joe installed the frame with four L-brackets to keep it in place. As you can see the paint is a damn good match. The bottom of the refrigerator sits on top of four additional L-shaped brackets to keep it elevated off the ground. And, you’ll see that there is a space below the new fridge. Some people use this space to install a small propane heater. Some people leave as is for additional, quick storage. We plan to create a little hinged door for easy storage, but I am the type that like things to be behind closed doors and orderly, so that’s how it’s gonna be. I think it will make a great storage space for a griddle and a frying pan. Or we may store the inverter here. I saw one person make it into a cool wine cabinet. There are lots of options for how to finish this opening off in a quick Google Search.


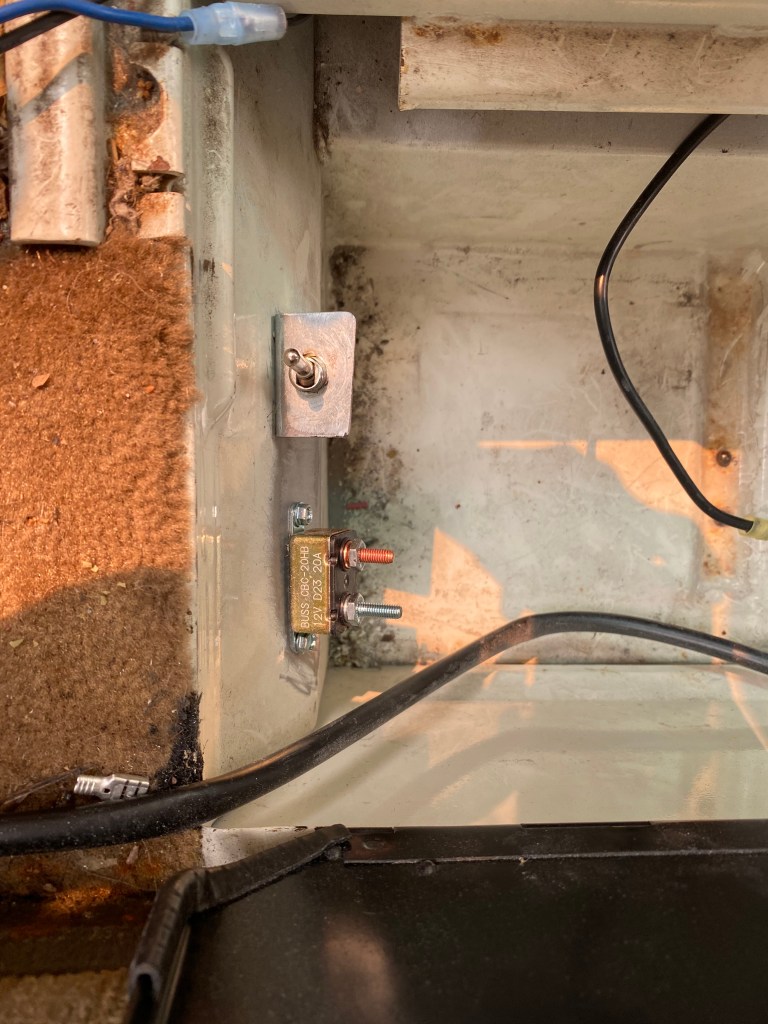
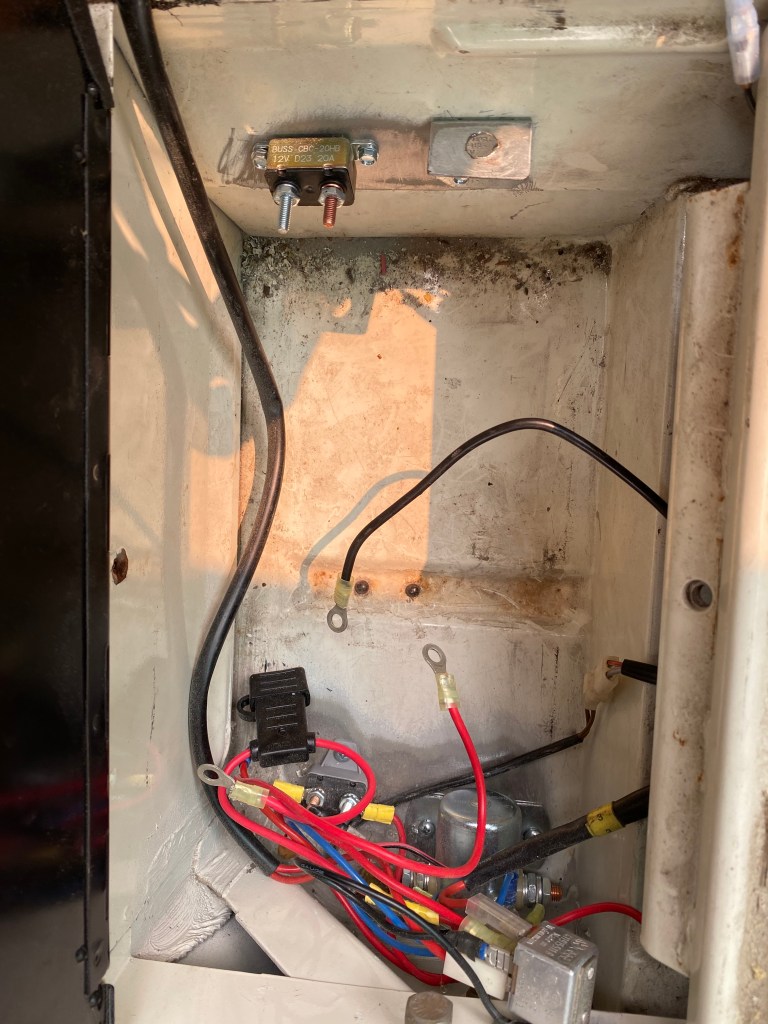
In all the blogs and videos I watched on this install, there wasn’t much in the way of suggestions for wiring. What most people seem to do is connect it to their aux battery. The T49 comes with both a 110v and a 12v hook-up. The 110v plugs into the wall of the cabinetry just like the vintage fridge. This allows it to be powered by the hook-up if you’re fortunate enough to have one. Like others, we also hooked ours up to the aux battery. Joe wired a breaker and an on/off switch into the space where our aux battery is kept. This means that if the vanagon is parked in our driveway at home, we can switch off the refrigerator. No need to keep it running unless it’s being used. When we head out on a trip, we switch it on. When the car is driving, the battery is charged and the fridge is running. When we are parked, we can set out our solar panel during the day to keep the aux battery charged and the fridge running day and night. If we park to hike or kayak, we can put our solar panel in the front window and charge it while we are hanging out and having fun.
Once installed and screwed into the face place, this baby is good to go. As a final step, I’d like to use the GoWesty laminate on the front of the T49 to make it look as built in as possible. So, pictures of the all-the-way finished product to come. As well as my reviews of the new fridge. I hae to admit I am super stoked about the freezer in the T-49. I am excited to take my Trader Joe’s Vegetable Gyozas in the freezer for one of my favorite quick lunches. More to come…